^ These are a list of cities that I thought of illustrating for my postcard
Dubai, UAE
1. Dubai Fountains
Worlds largest choreographed fountain system set on the 30-acre manmade Burj Khalifa Lake, at the center of the Downtown Dubai development in Dubai, United Arab Emirates(http://en.wikipedia.org/wiki/The_Dubai_Fountain)

2. Burj Al Arab (Tower of the Arabs)
A hotel

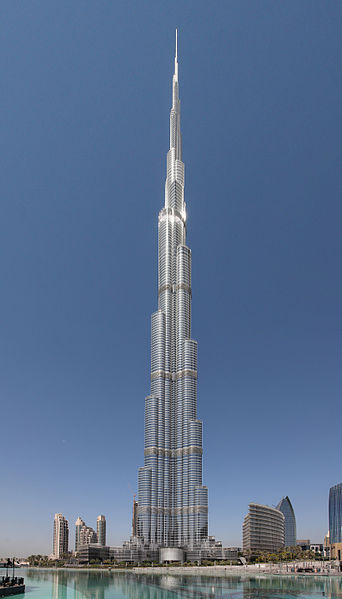
3. Burj Khalifa
A skyscraper in Dubai (http://en.wikipedia.org/wiki/Burj_Khalifa)
4. Palm Islands Jumeirah

5. Emirates tower
'..complex contains the Emirates Office Tower and Jumeirah Emirates Towers Hotel' (http://en.wikipedia.org/wiki/Emirates_Towers)

Kuala Lumpur, Malaysia
1. Petronas Twin Towers

2. Kuala Lumpur Tower
A skyscraper in Kuala Lumpur

3.National Mosque of Malaysia

4.Merdeka Square

5.Batu Cave
A limestone hill that has a series of caves and cave temples in the Gombak district, 13 kilometres north of Kuala Lumpur

Seoul, Korea
1. N Seoul Tower/YTN Seoul Tower
A communication and observation tower located on Namsan Mountain in central Seoul, South Korea. It marks the highest point in Seoul. (http://en.wikipedia.org/wiki/N_Seoul_Tower)

2. Heunginjimun
Heunginjimun, literally "Gate of Rising Benevolence" or more commonly known as Dongdaemun, is one of the The Eight Gates of Seoul in the Fortress Wall of Seoul, a prominent landmark in central Seoul. (http://en.wikipedia.org/wiki/Heunginjimun)
.jpg)
3. Gyeongbokgung
A royal palace located in northern Seoul (http://en.wikipedia.org/wiki/Gyeongbokgung)

4. 63 Building/Hanhwa 63 city
a skyscraper on Yeouido island, overlooking the Han River in Seoul, South Korea. (http://en.wikipedia.org/wiki/63_Building)

5. War Memorial Seoul

New Delhi, India
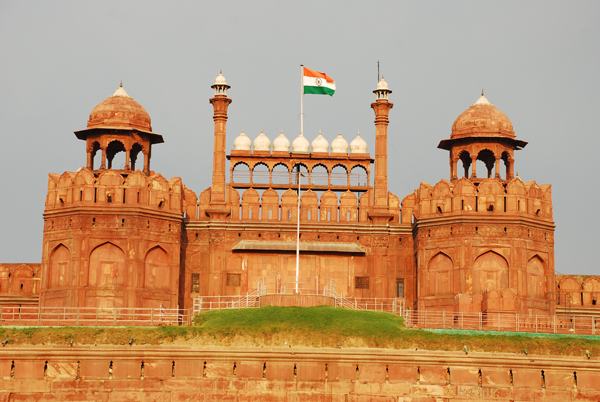
1. The Red Fort
'The Red Fort was the residence of the Mughal emperors of India for nearly 200 years, until 1857' (http://en.wikipedia.org/wiki/Red_Fort)
Mughal - The Mughal Empire, self-designated as Gurkani, was an empire extending over large parts of the Indian subcontinent and ruled by a dynasty of Chagatai-Turkic origin.
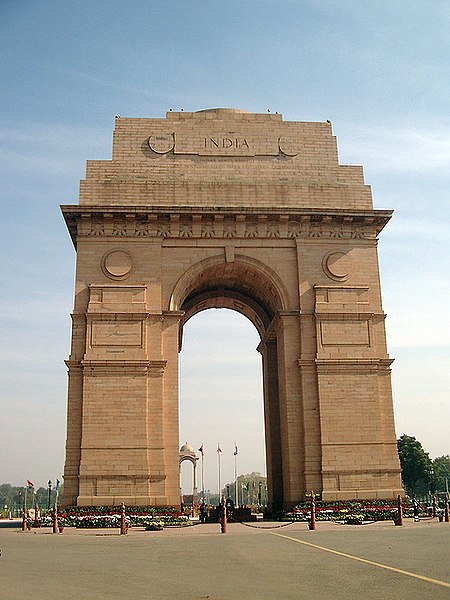
2.India Gate
The India Gate is a national monument of India. (http://en.wikipedia.org/wiki/India_Gate)
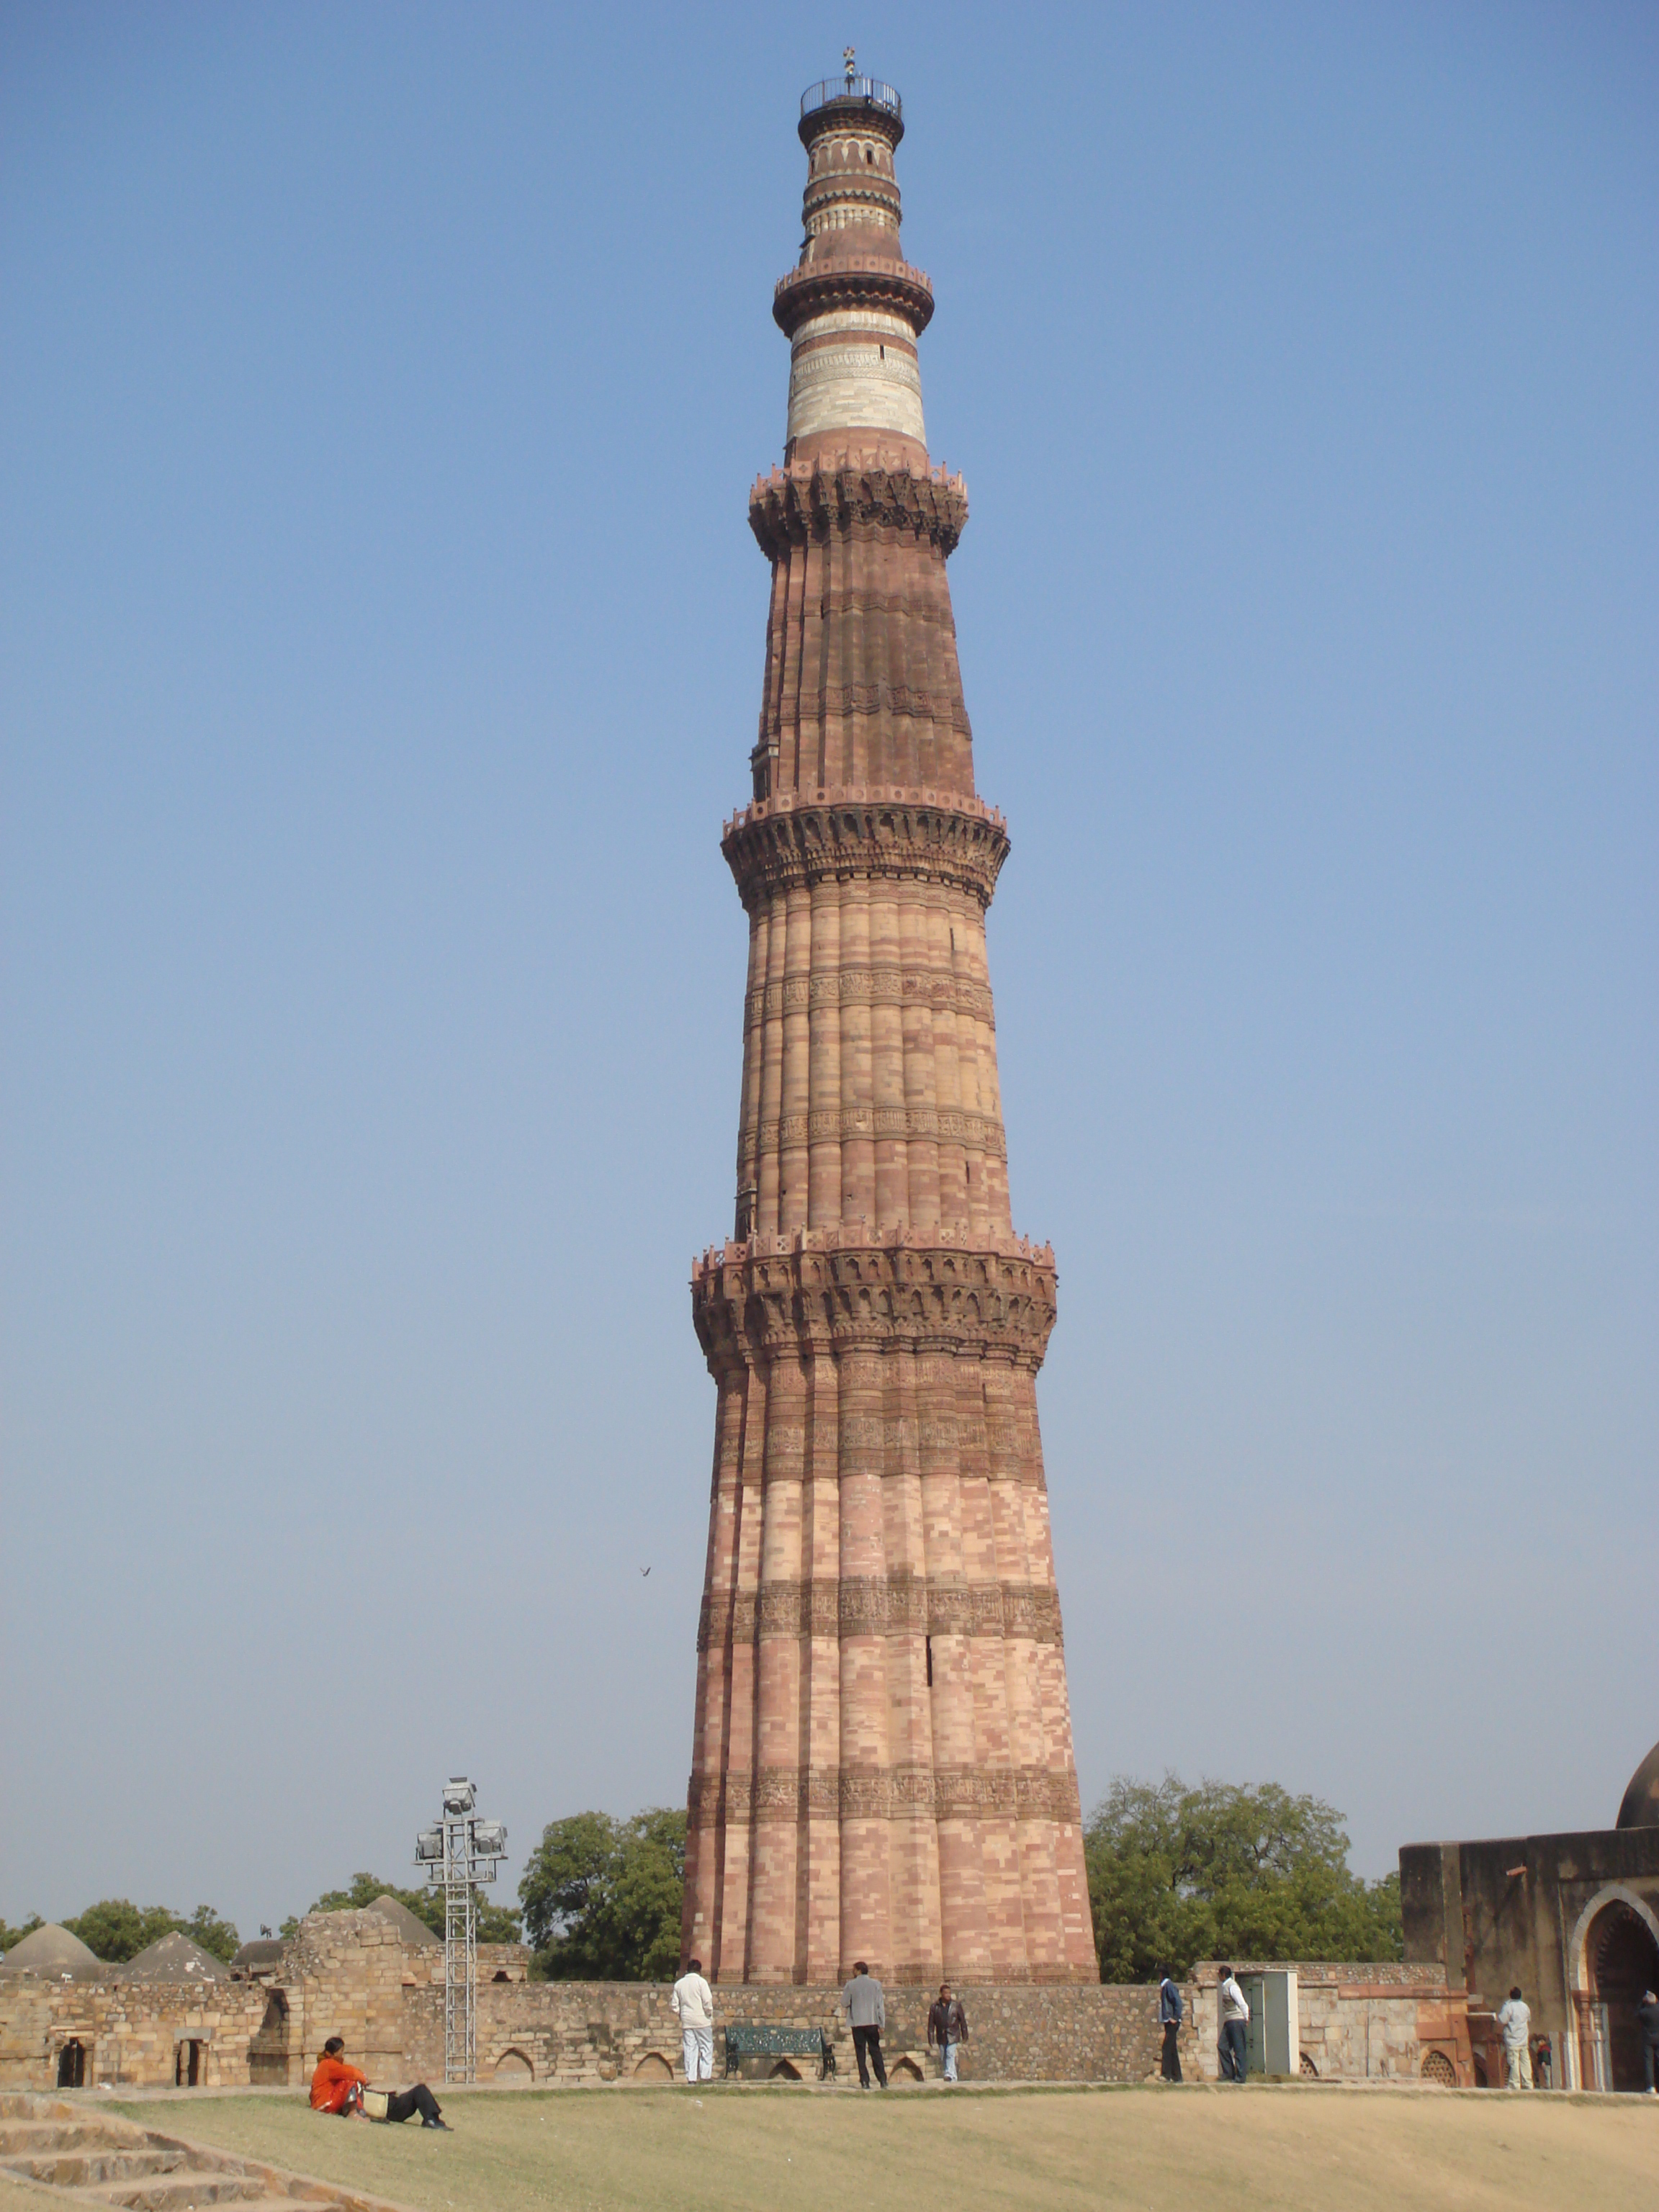
3.Qutb Minar
The tallest minar in India (http://en.wikipedia.org/wiki/Qutb_Minar)
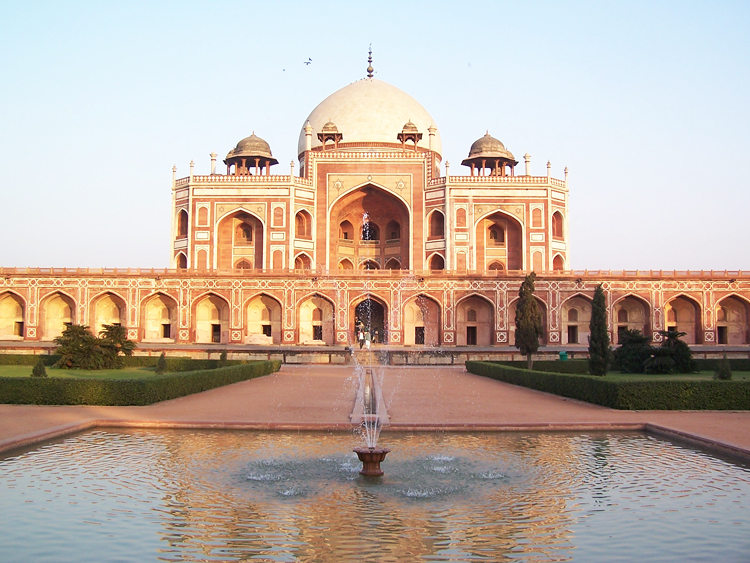
4.Humayun's Tomb
Humayun's tomb is the tomb of the Mughal Emperor Humayun in Delhi, India. The tomb was commissioned by Humayun's first wife Bega Begum in 1569-70. (http://en.wikipedia.org/wiki/Humayun's_Tomb)
5.Lotus Temple